• About
  • Gallery
  • Services
    • Pillows for Good
  • Blog
  • Contact
  • For Sale
Menu

 August Blues

sherri@augustblues.com
Denton, TX
940.597.0208

 August Blues

  • About
  • Gallery
  • Services
  • Pillows For Good
    • Pillows for Good
  • Blog
  • Contact
  • For Sale
AB_forsale_banner.jpg

Blog

Builder Basic to Personality Filled - A Kitchen Update

January 16, 2015 Sherri Rice
shelf-vignette.jpg

We purchased our then-5-year-old builder-basic house 9 years ago, with the intention of adding personality and character over time. Well, SLOWLY we are getting there, so I am very excited to show you our {mostly, for now} finished kitchen! I seem to spend a lot of time in this room (go figure!), so it has always been a priority to have it functioning as best as it can, and looking good in the process. It is a fairly generous size, as kitchens go, and has large windows that face east - I love morning sunshine! But, the cupboards and finishes are very basic, and as a result, have been showing their age quickly. A full remodel isn't in the budget, so we have been looking for ways to make it "us" on a VERY tiny budget.

This is what we started with (this picture was taken a year after we moved in)...

August Blues - Kitchen Before

And this is what it looks like now...

August Blues - Kitchen Cupboards3

Much better! It's really been lots of smaller projects that have added up to a completely different look. We started by changing the lighting, replacing some of the cabinets with open shelves, painting the cabinets that were left, and putting new flooring in. I talked about our breakfast bar here- it's been one of my most viewed posts! And I shared our kitchen table journey here. I won't talk about all of the rest of the changes here, but if you want to know more about any of the details, let me know in the comments.

August Blues - Kitchen Cupboards1

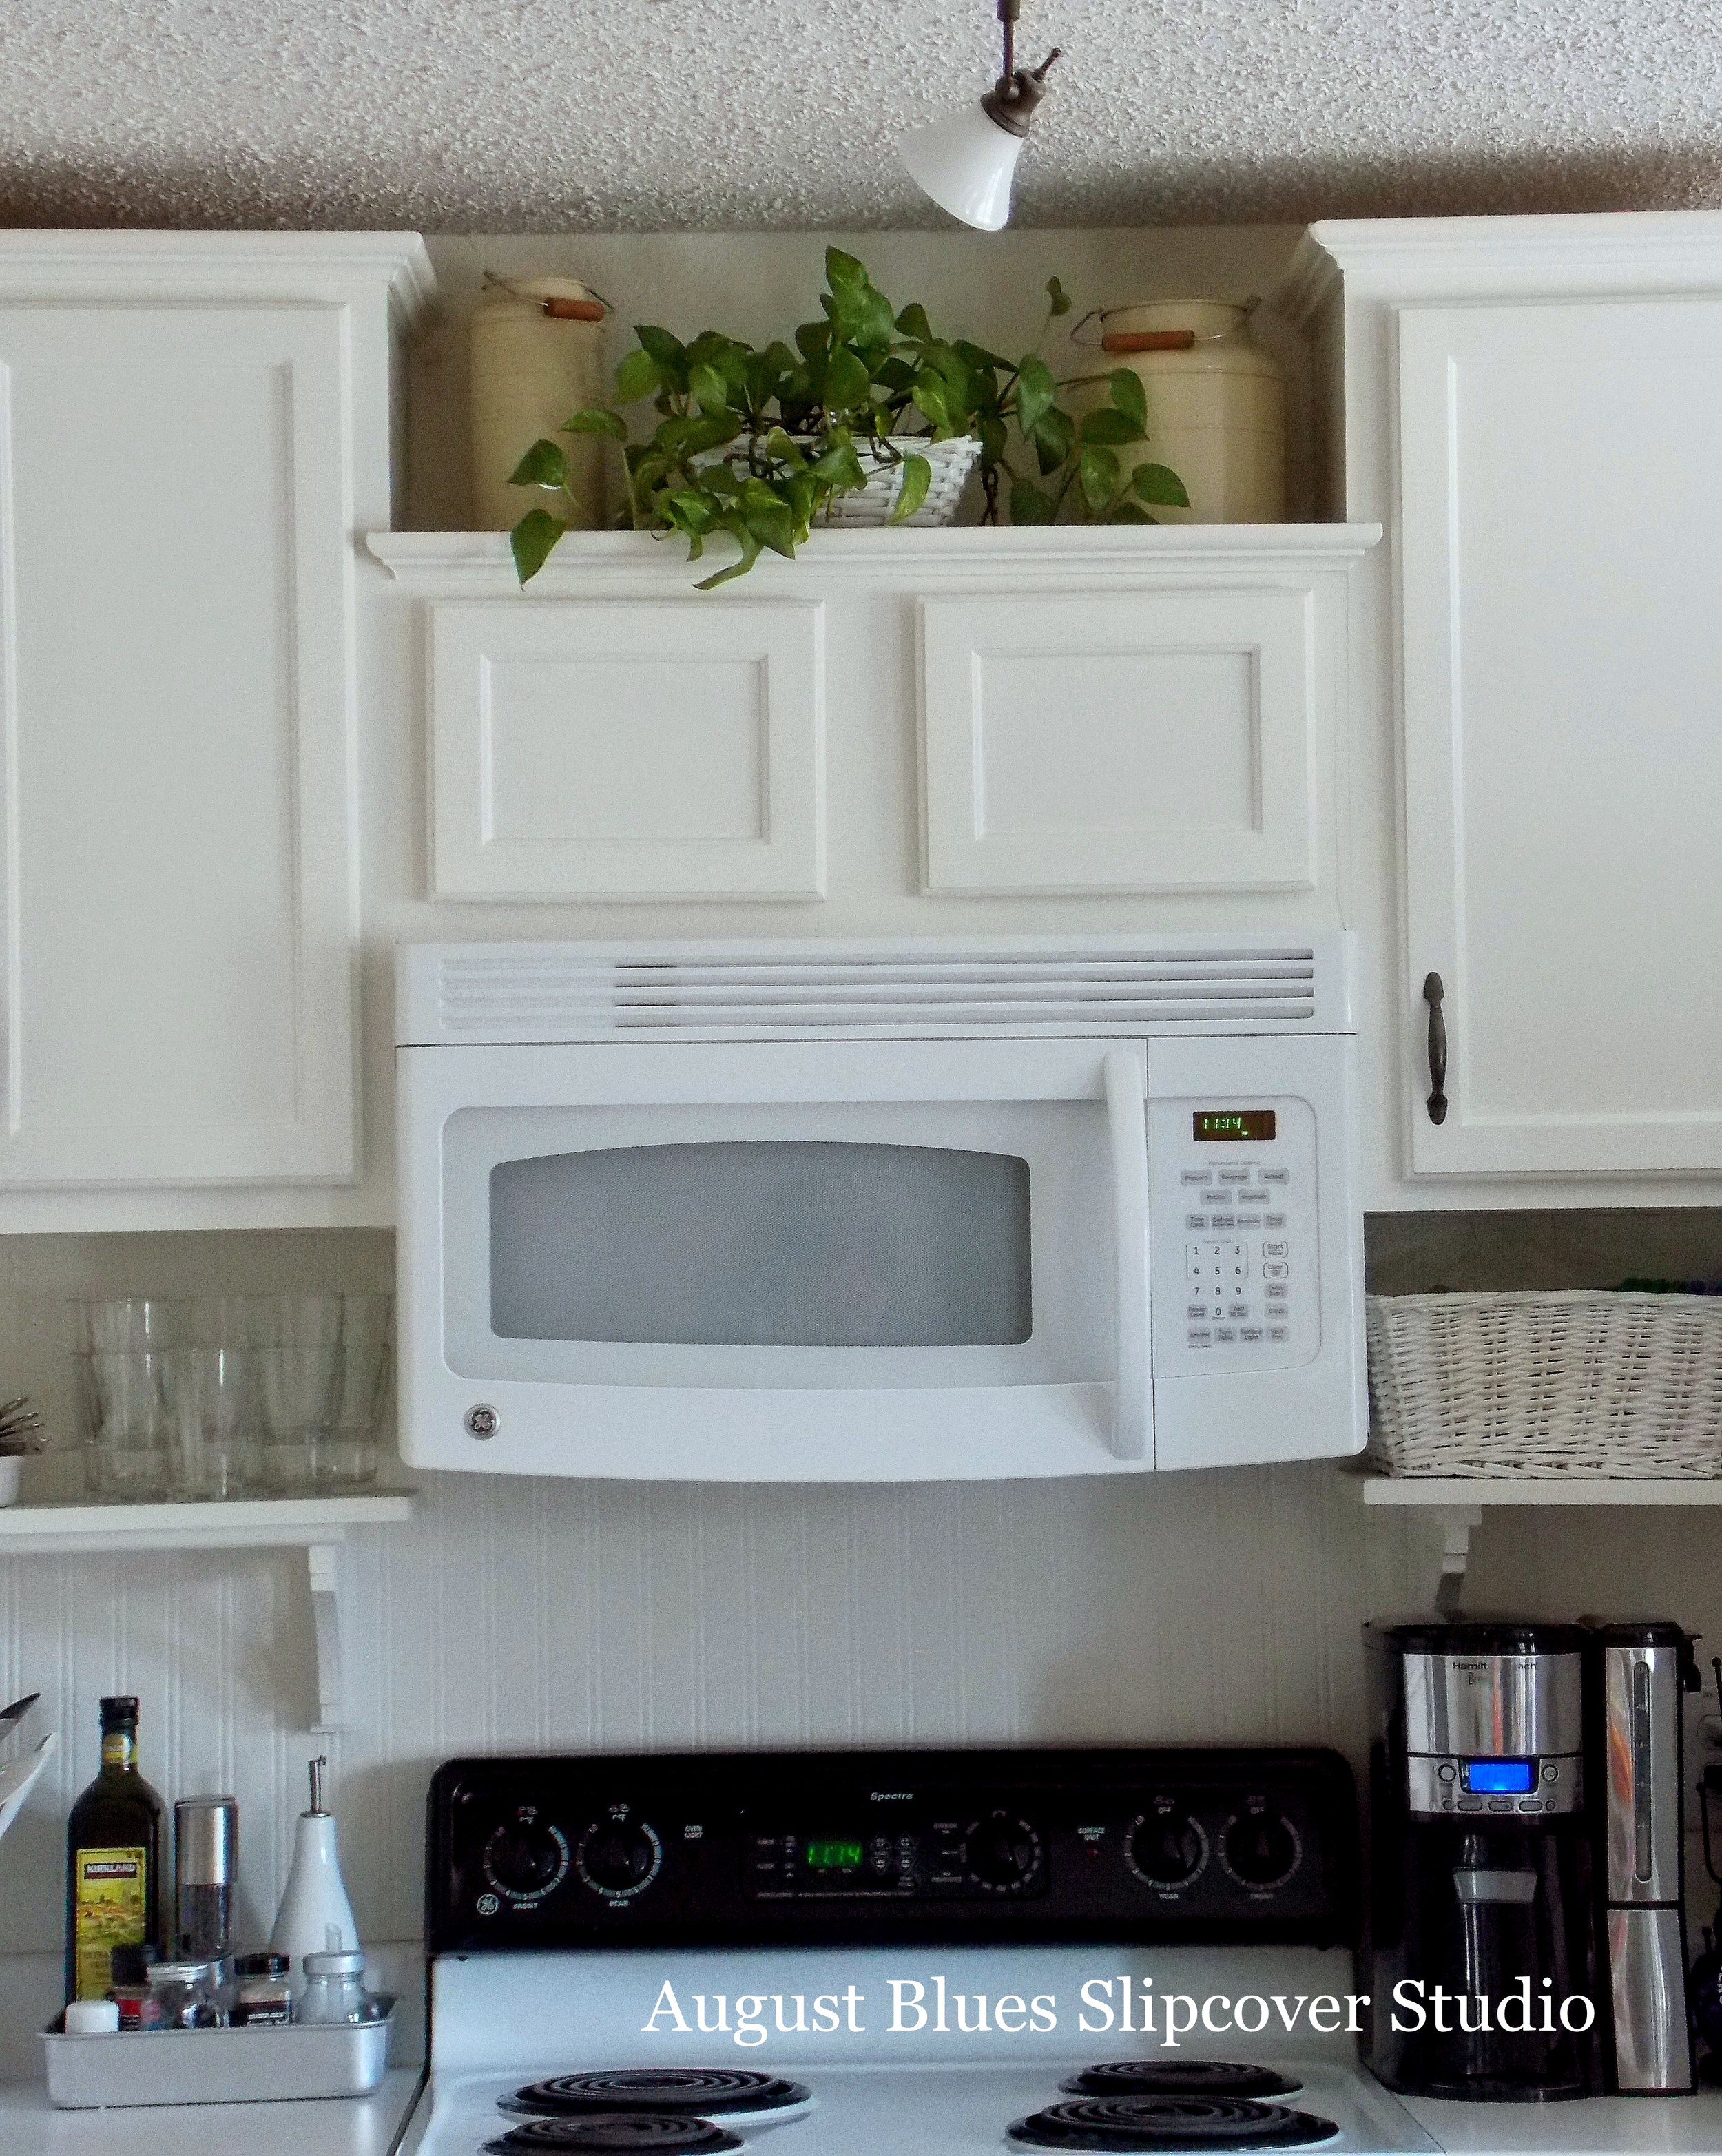
The biggest change we have made since the breakfast bar project is raising the cabinets and installing a shelf underneath. I first saw this idea on Pinterest and thought it could work because it could give us more closed storage and enable us to move some of our everyday things off the counters. It worked and I love it! I won't give you step-by-step instructions, as others have already done that, but I thought I would show you how it works for us. And maybe it will inspire your own kitchen makeover!

Our adventure in cupboard rearranging started with the "hutch" we made that is located on the other side of our fridge...

August Blues - Hutch2

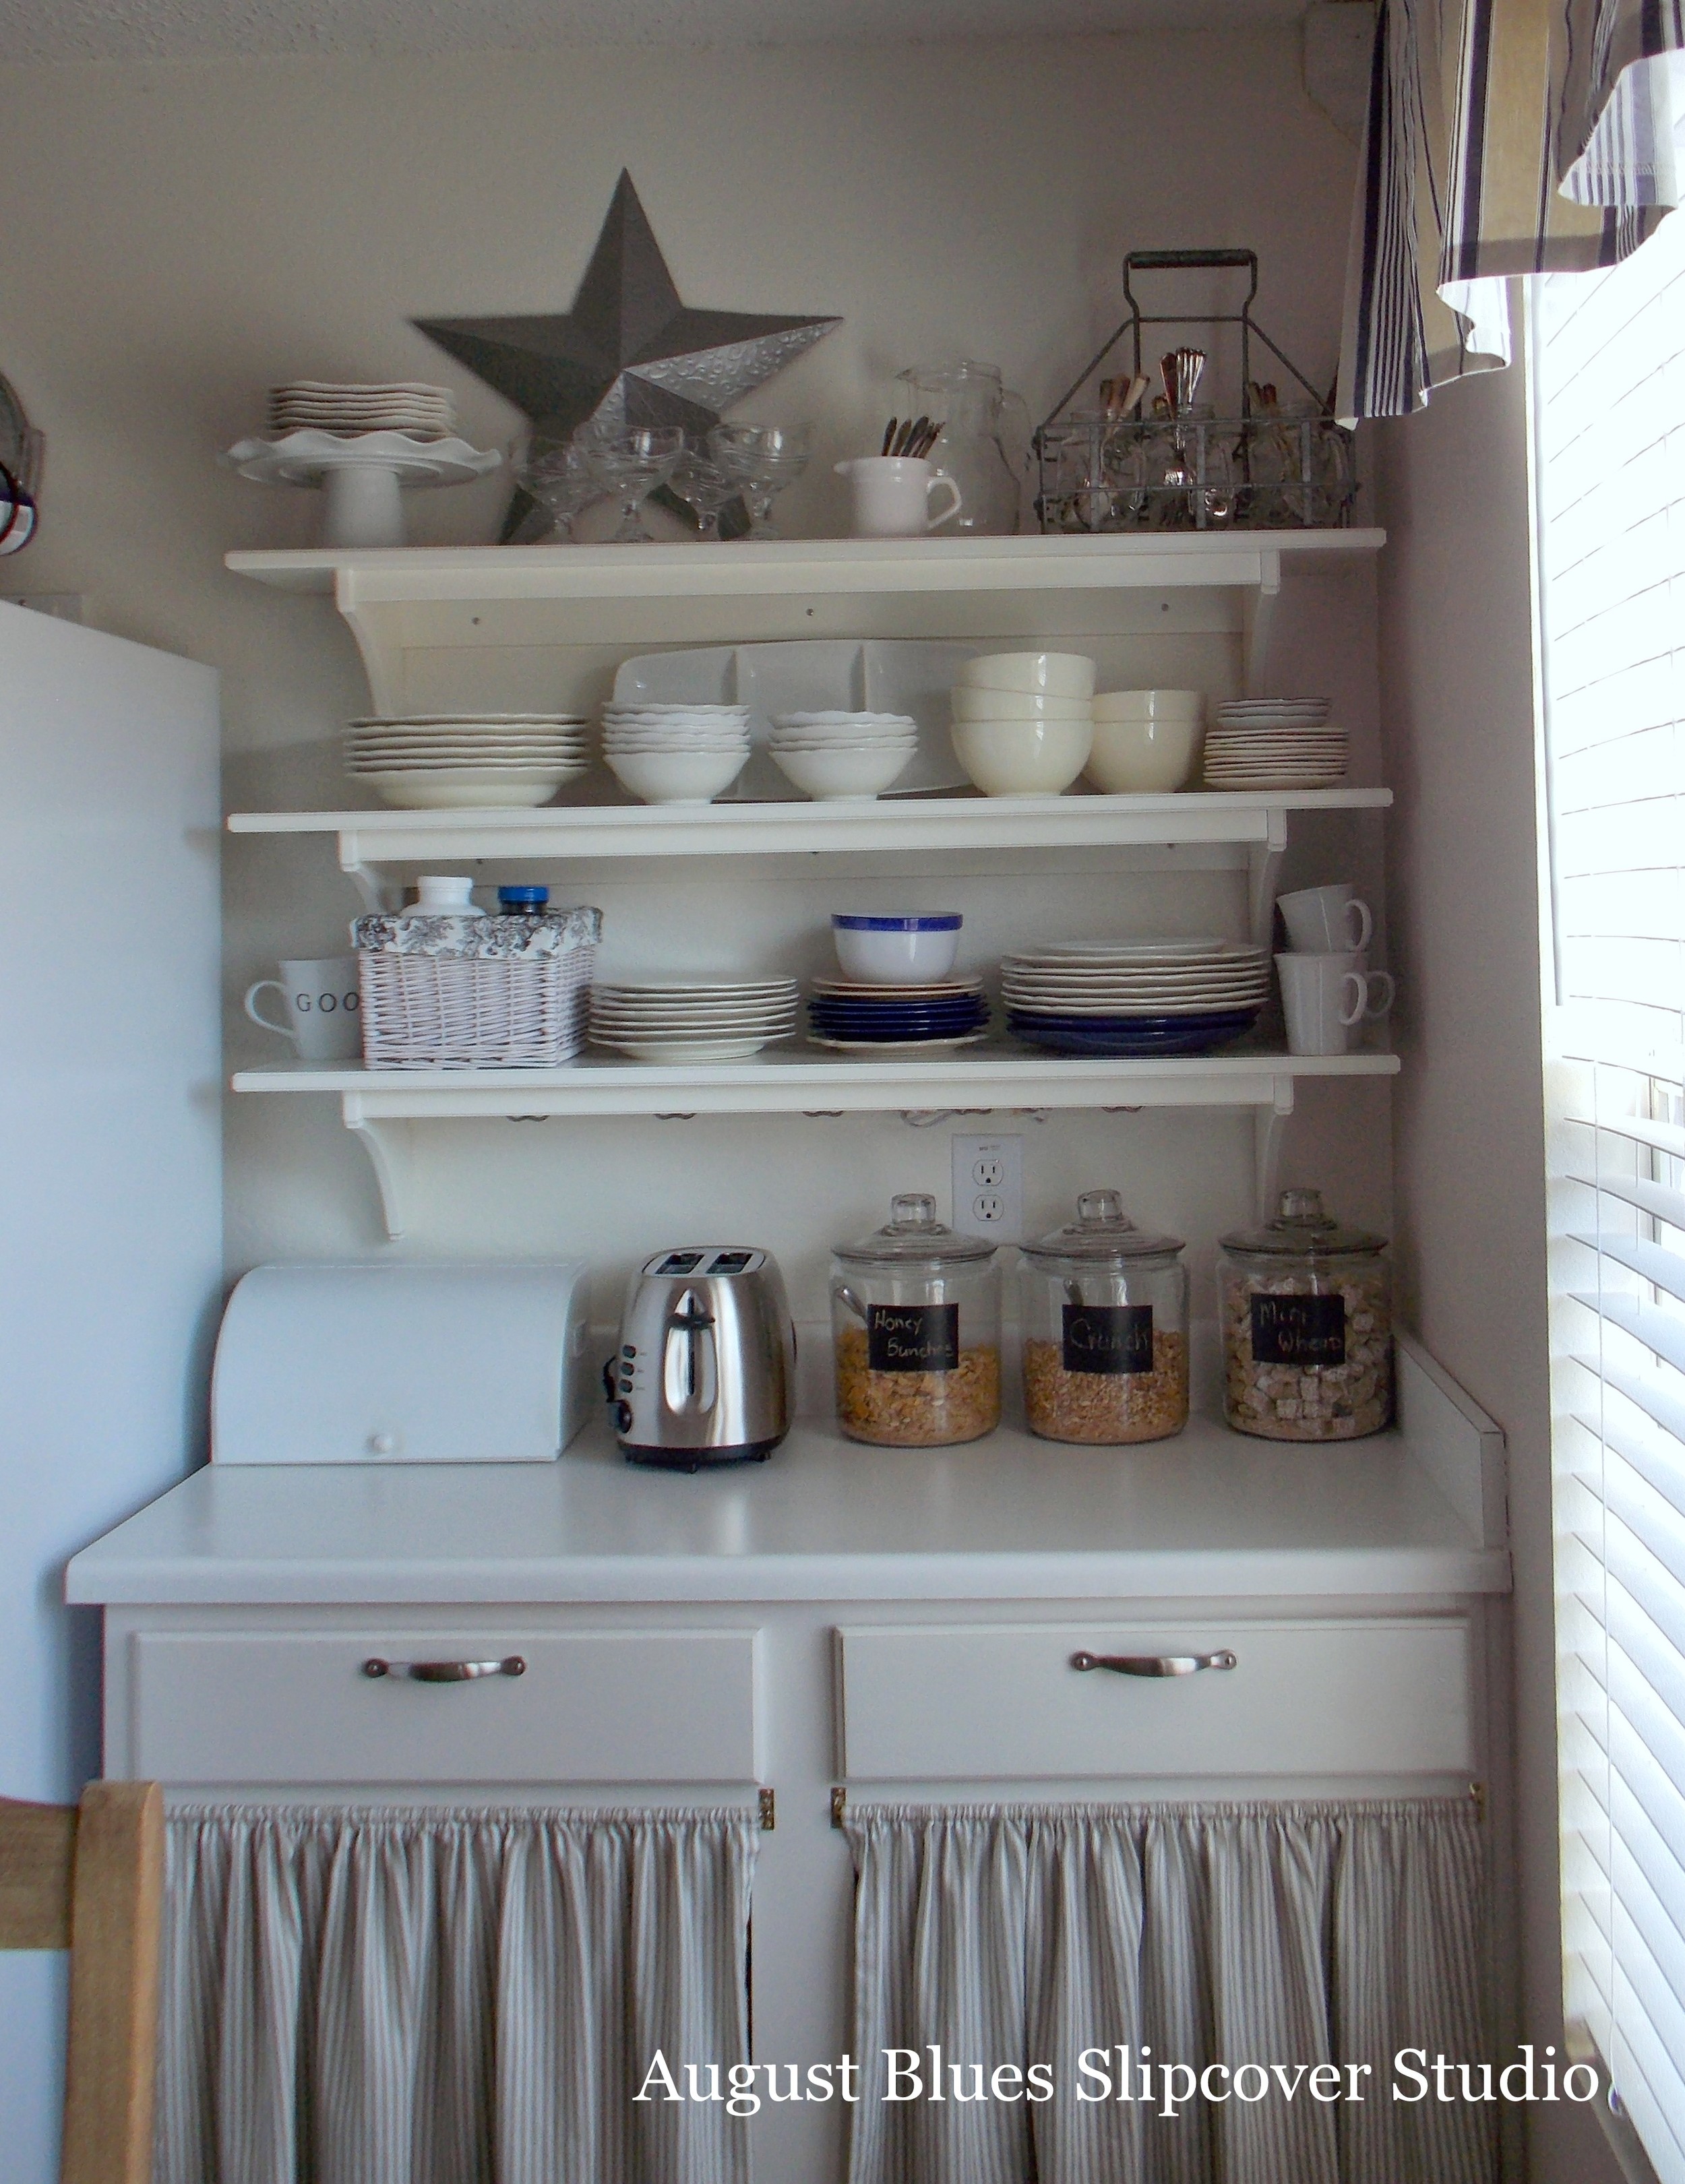
We removed the upper cabinet and the lower cabinet doors. Then we installed shelves from Ikea (here) and I made curtains out of ticking for the lower cabinet. We also painted it a slightly different shade of white and used different drawer pulls, so that it looked distinct from the rest of the kitchen cabinetry.

August Blues - Hutch

The day we took those cabinets down, I REALLY just wanted to take them all out! But, I know myself and know that a little closed storage is a good thing :) This hutch is one of my favorite parts of the kitchen! It holds all our everyday dishes and has become our breakfast center...

August Blues - Hutch Details

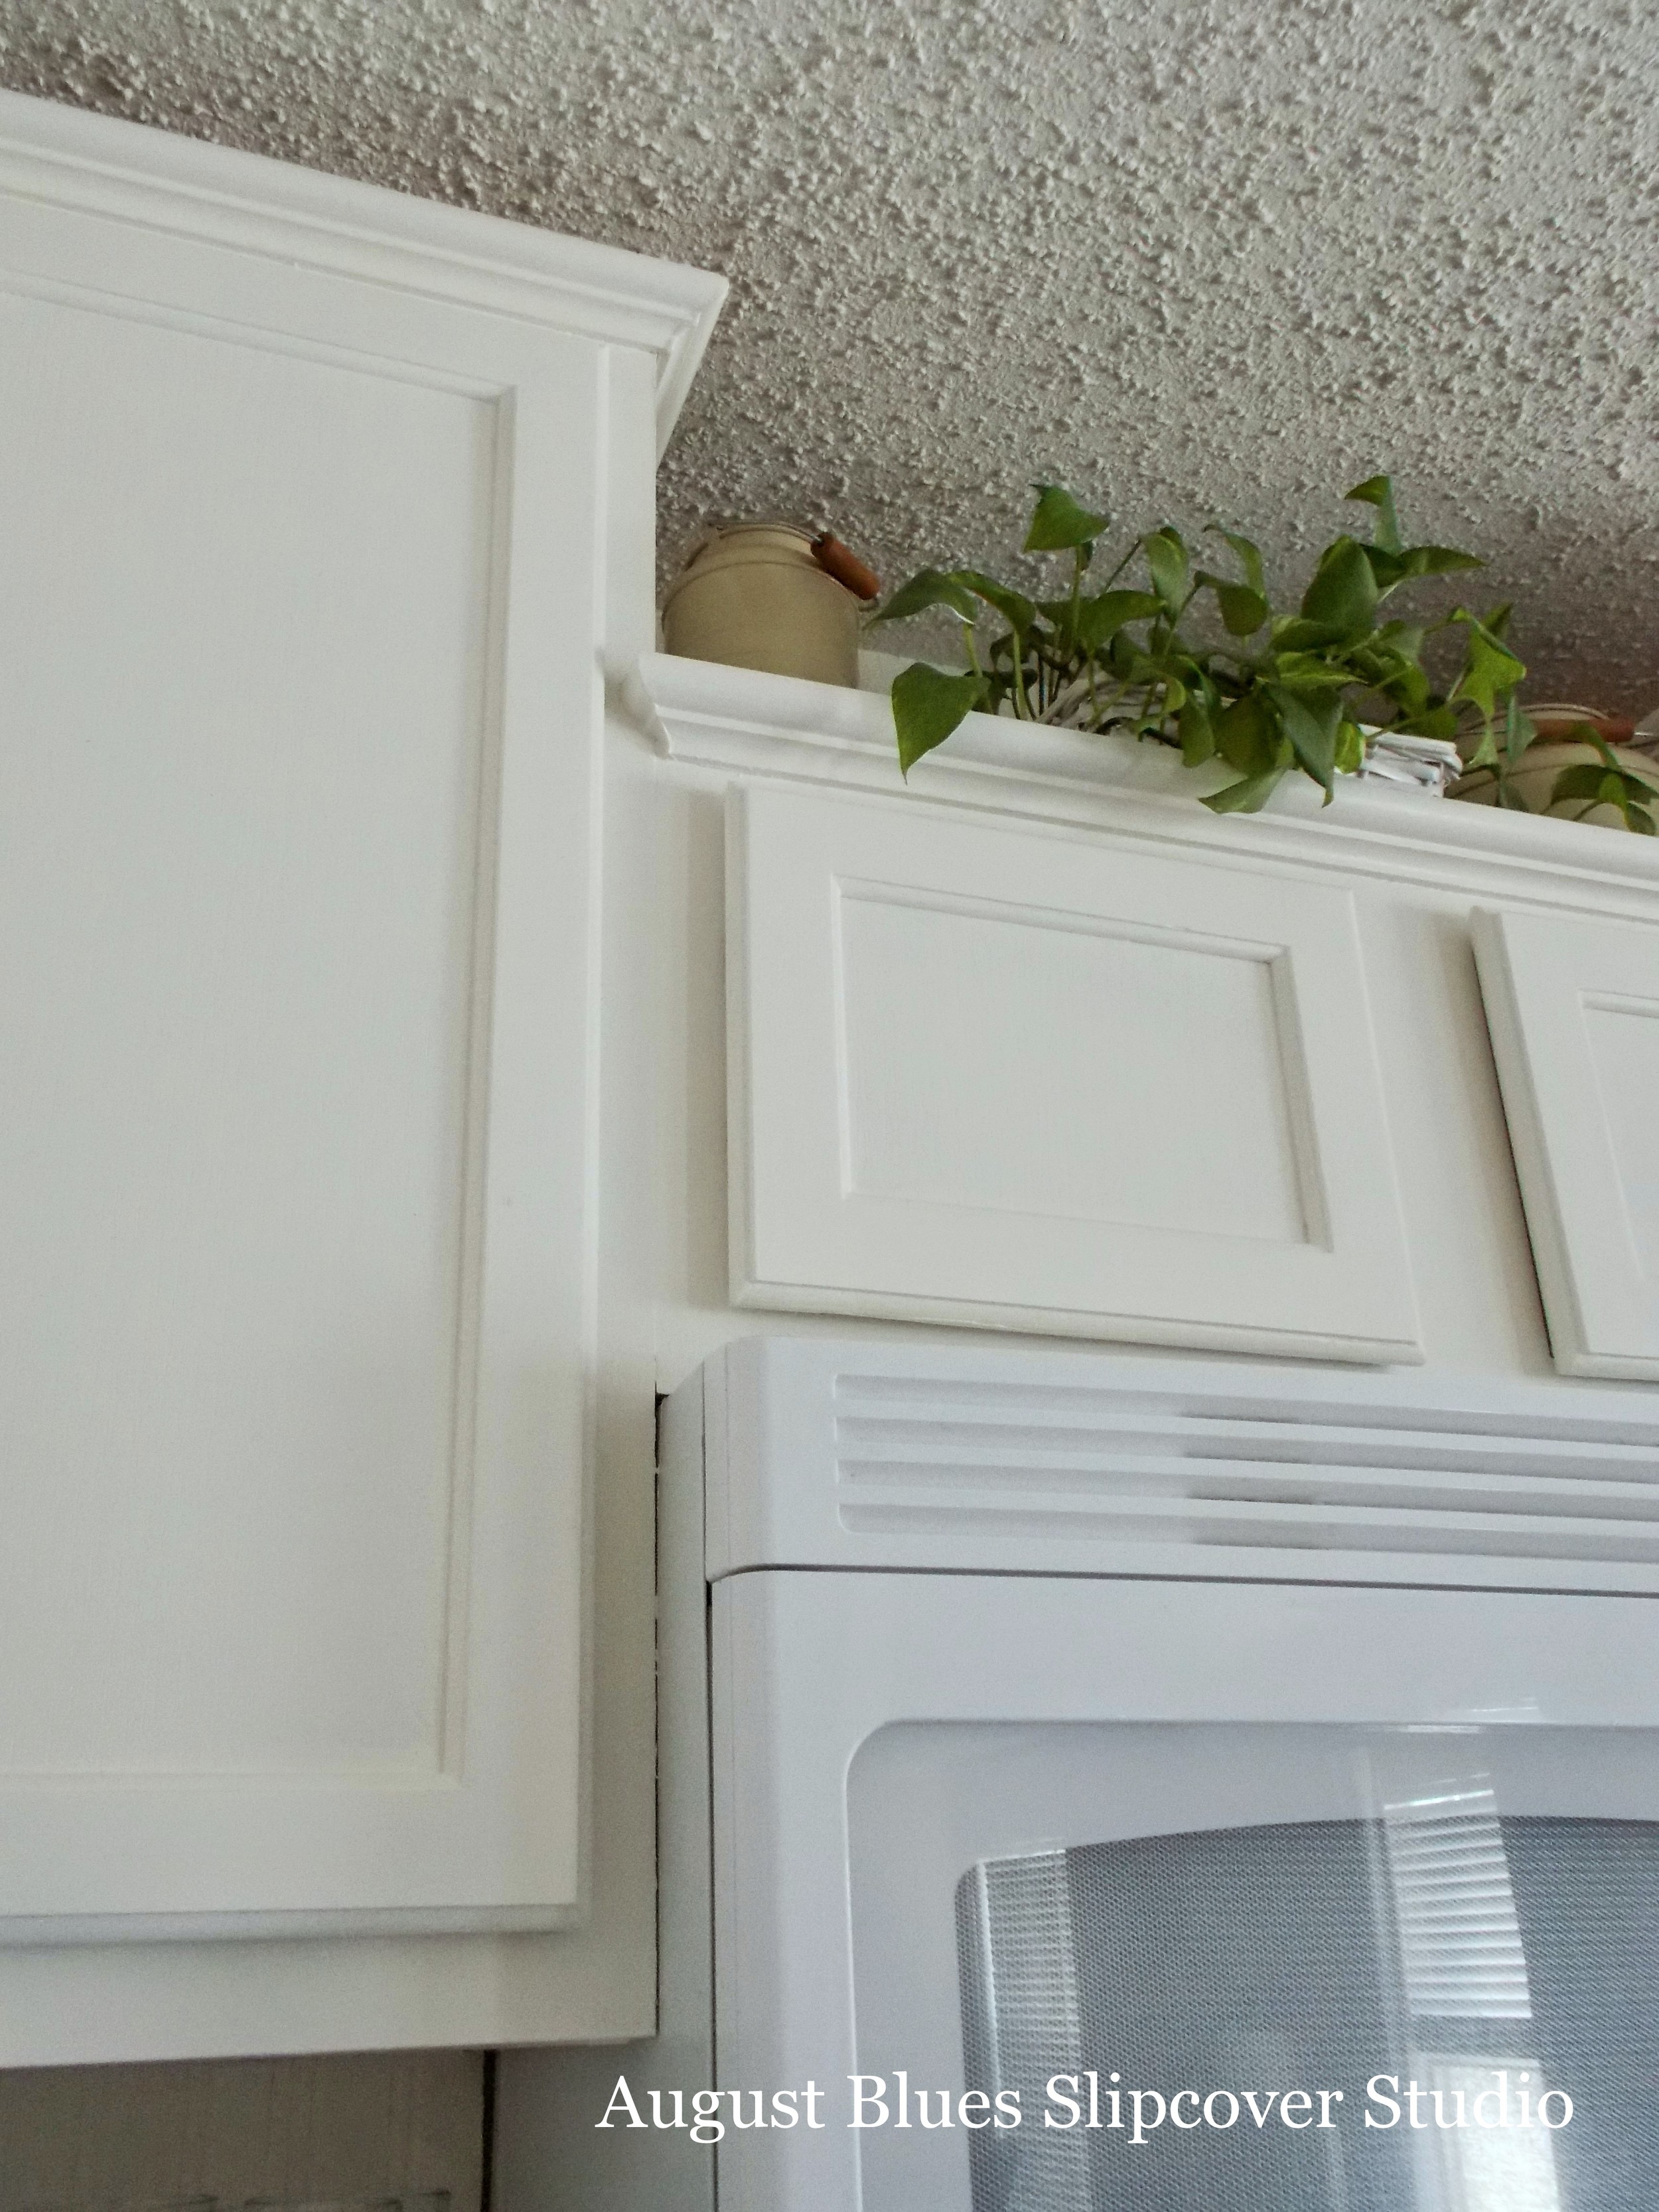
Taking the cabinets down, and then putting them back up, was definitely a two-person job. We didn't put them all the way to the ceiling because we needed to get a hand (and a drill) in that space to screw the cabinets back to the wall (and if they were any higher, I wouldn't be able to reach anything!). The new small-scale crown molding around the top finishes them off.  The cabinet over the microwave needed to stay in place, so we made a little niche area. I think it makes the cabinets more interesting.

August Blues - Niche
August Blues - Niche2

We put up beadboard wallpaper for a backsplash and installed the shelves. We used 10" boards since I didn't want the shelves to be as deep as the cupboards. The brackets were unfinished wood and came from Home Depot.

August Blues - Shelf Brackets

It was fun to organize the shelves with our often-used (and pretty) things - the baskets hold spices, tea fixings, and dog paraphernalia).

August Blues - Baskets
August Blues - Shelves

We initially painted the shelves and backsplash a different white (Benjamin Moore Cloud White) than the cupboards (a mystery color). But, then I tried to touch up the finish on the upper cupboards and realized that my touch-up color was not the same as the initial color (has anyone else done that?). Since I wasn't certain we could match the original color, we ended up painting the upper cupboards (again!) in the same color as the shelves and backspash. And I like it better :)

August Blues - Table Island

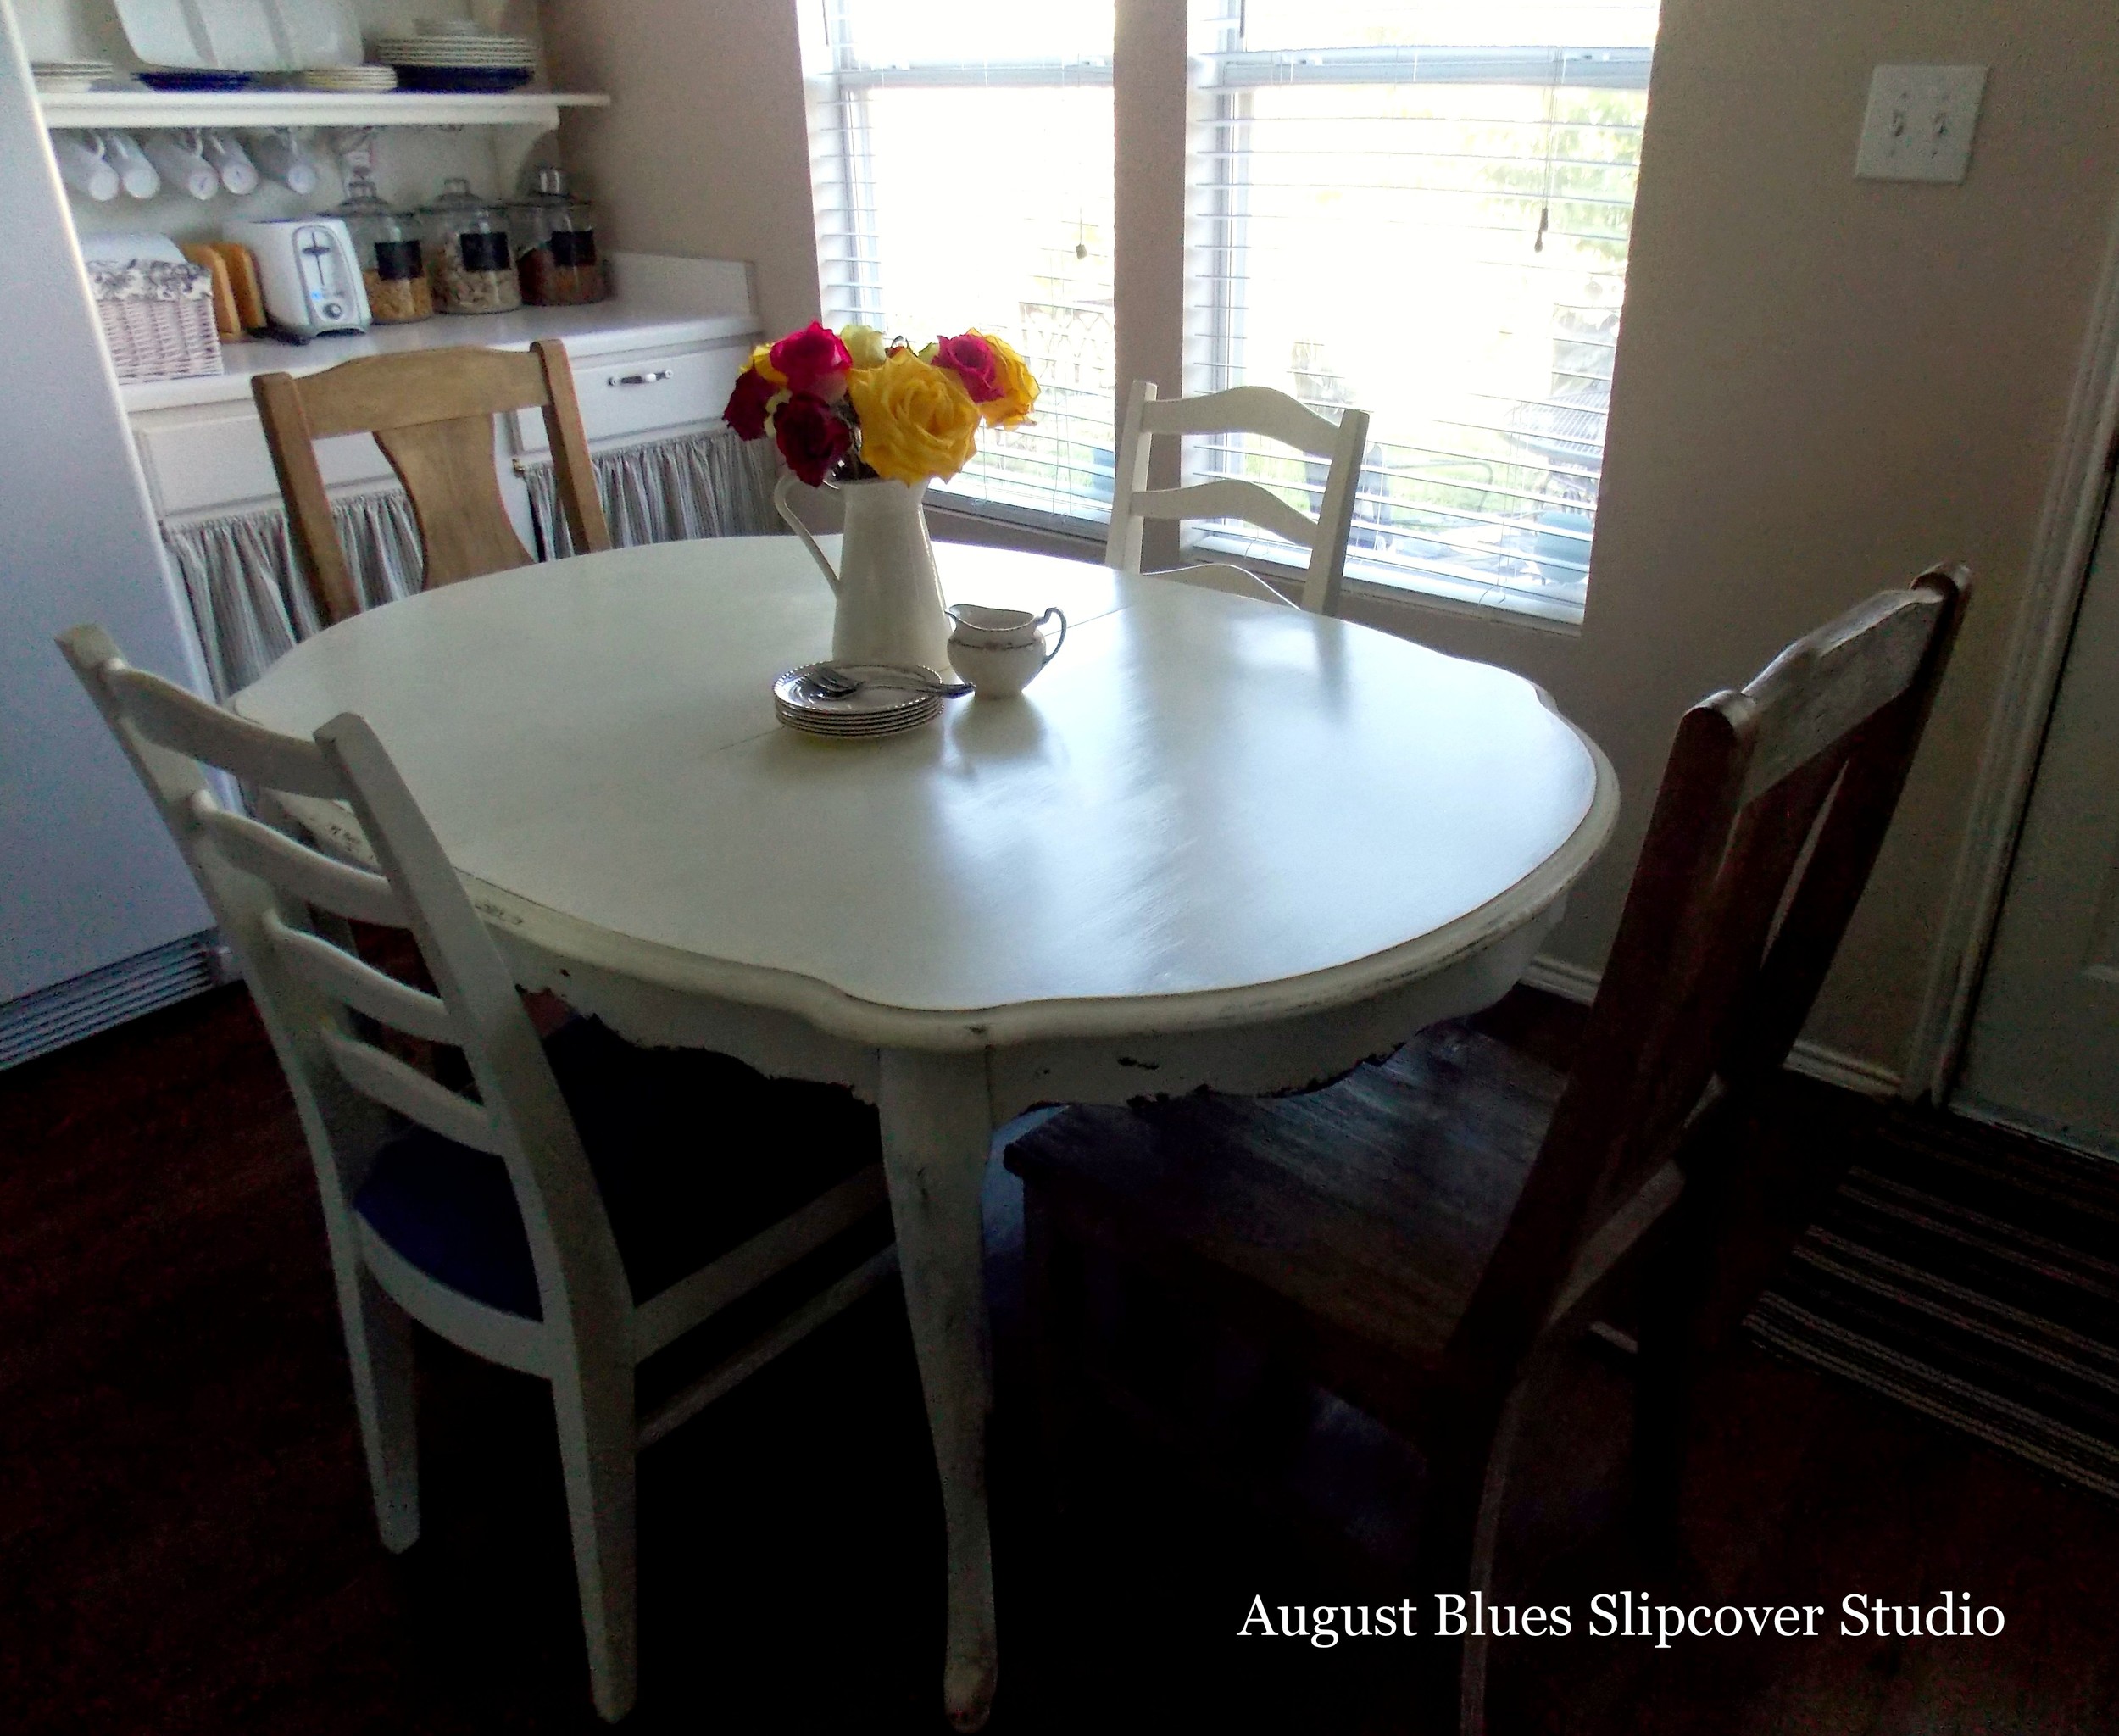
If you are wondering about our "island," it is a vintage table I found at a local re-sale shop. It was originally intended to be a desk, but then we had to do a furniture shuffle and it ended up being our island. The "garbage" cans (also from Ikea) hold our dog food a little more stylishly than the plastic bins we were using.

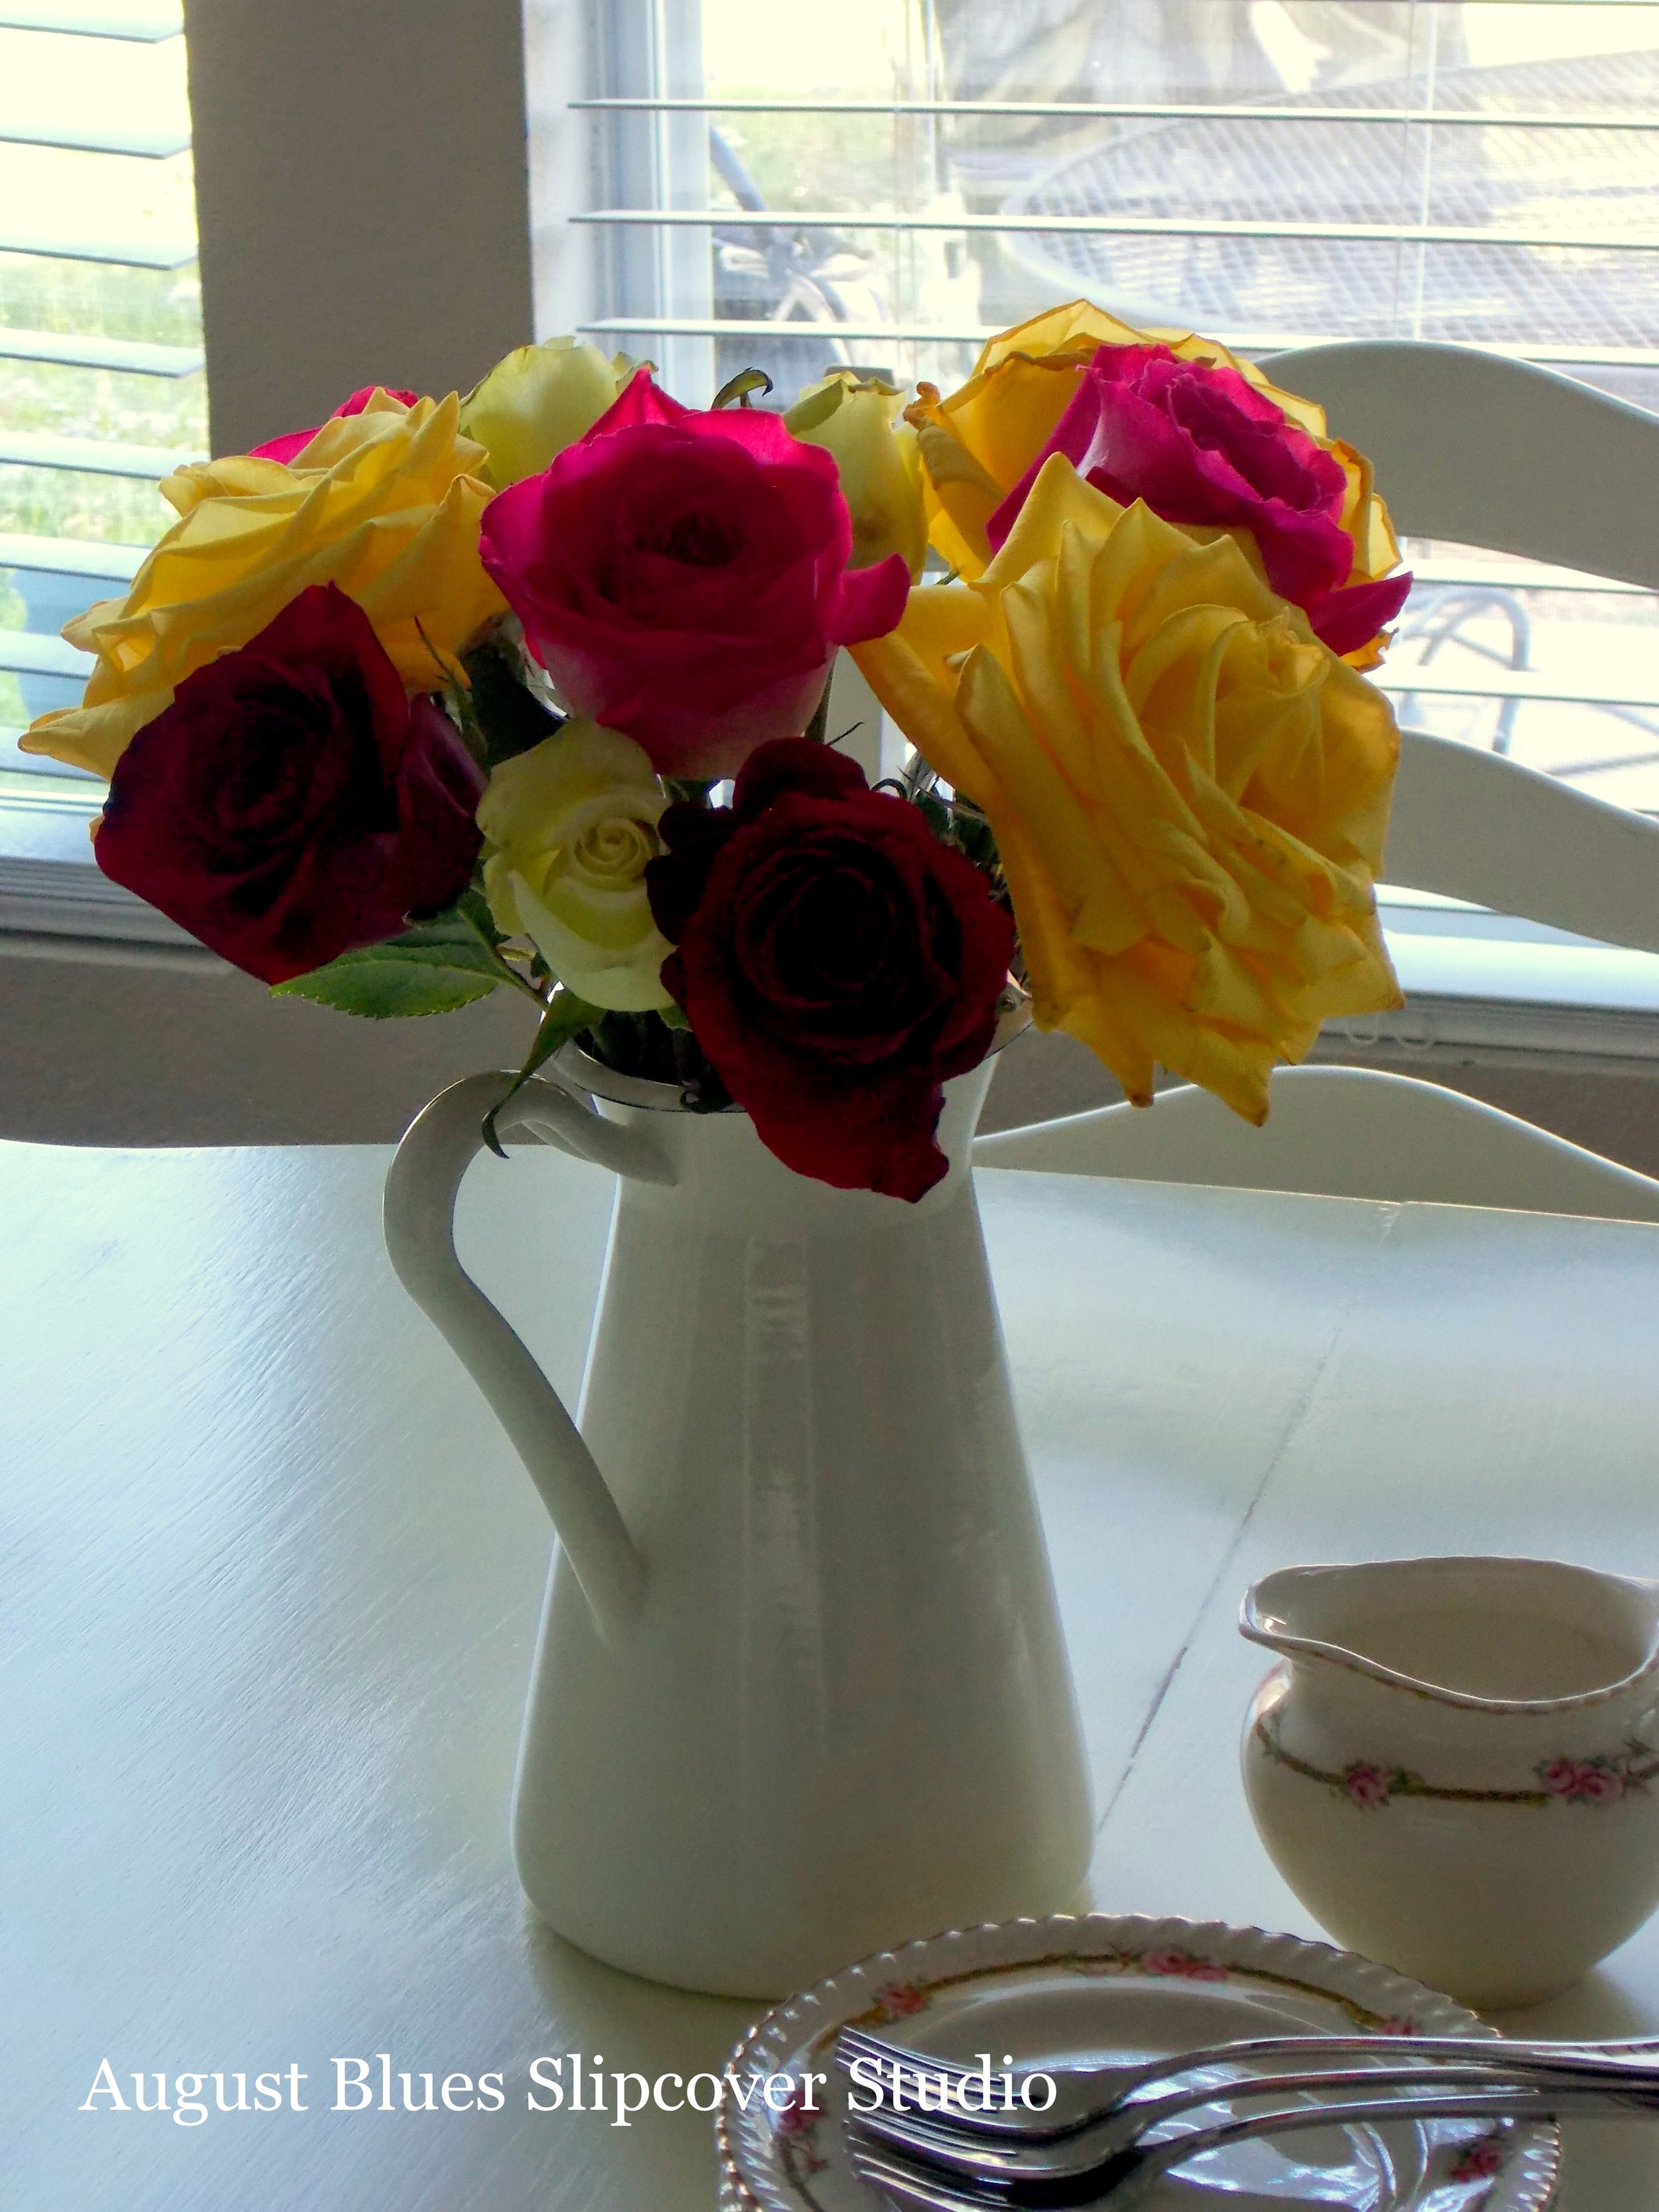
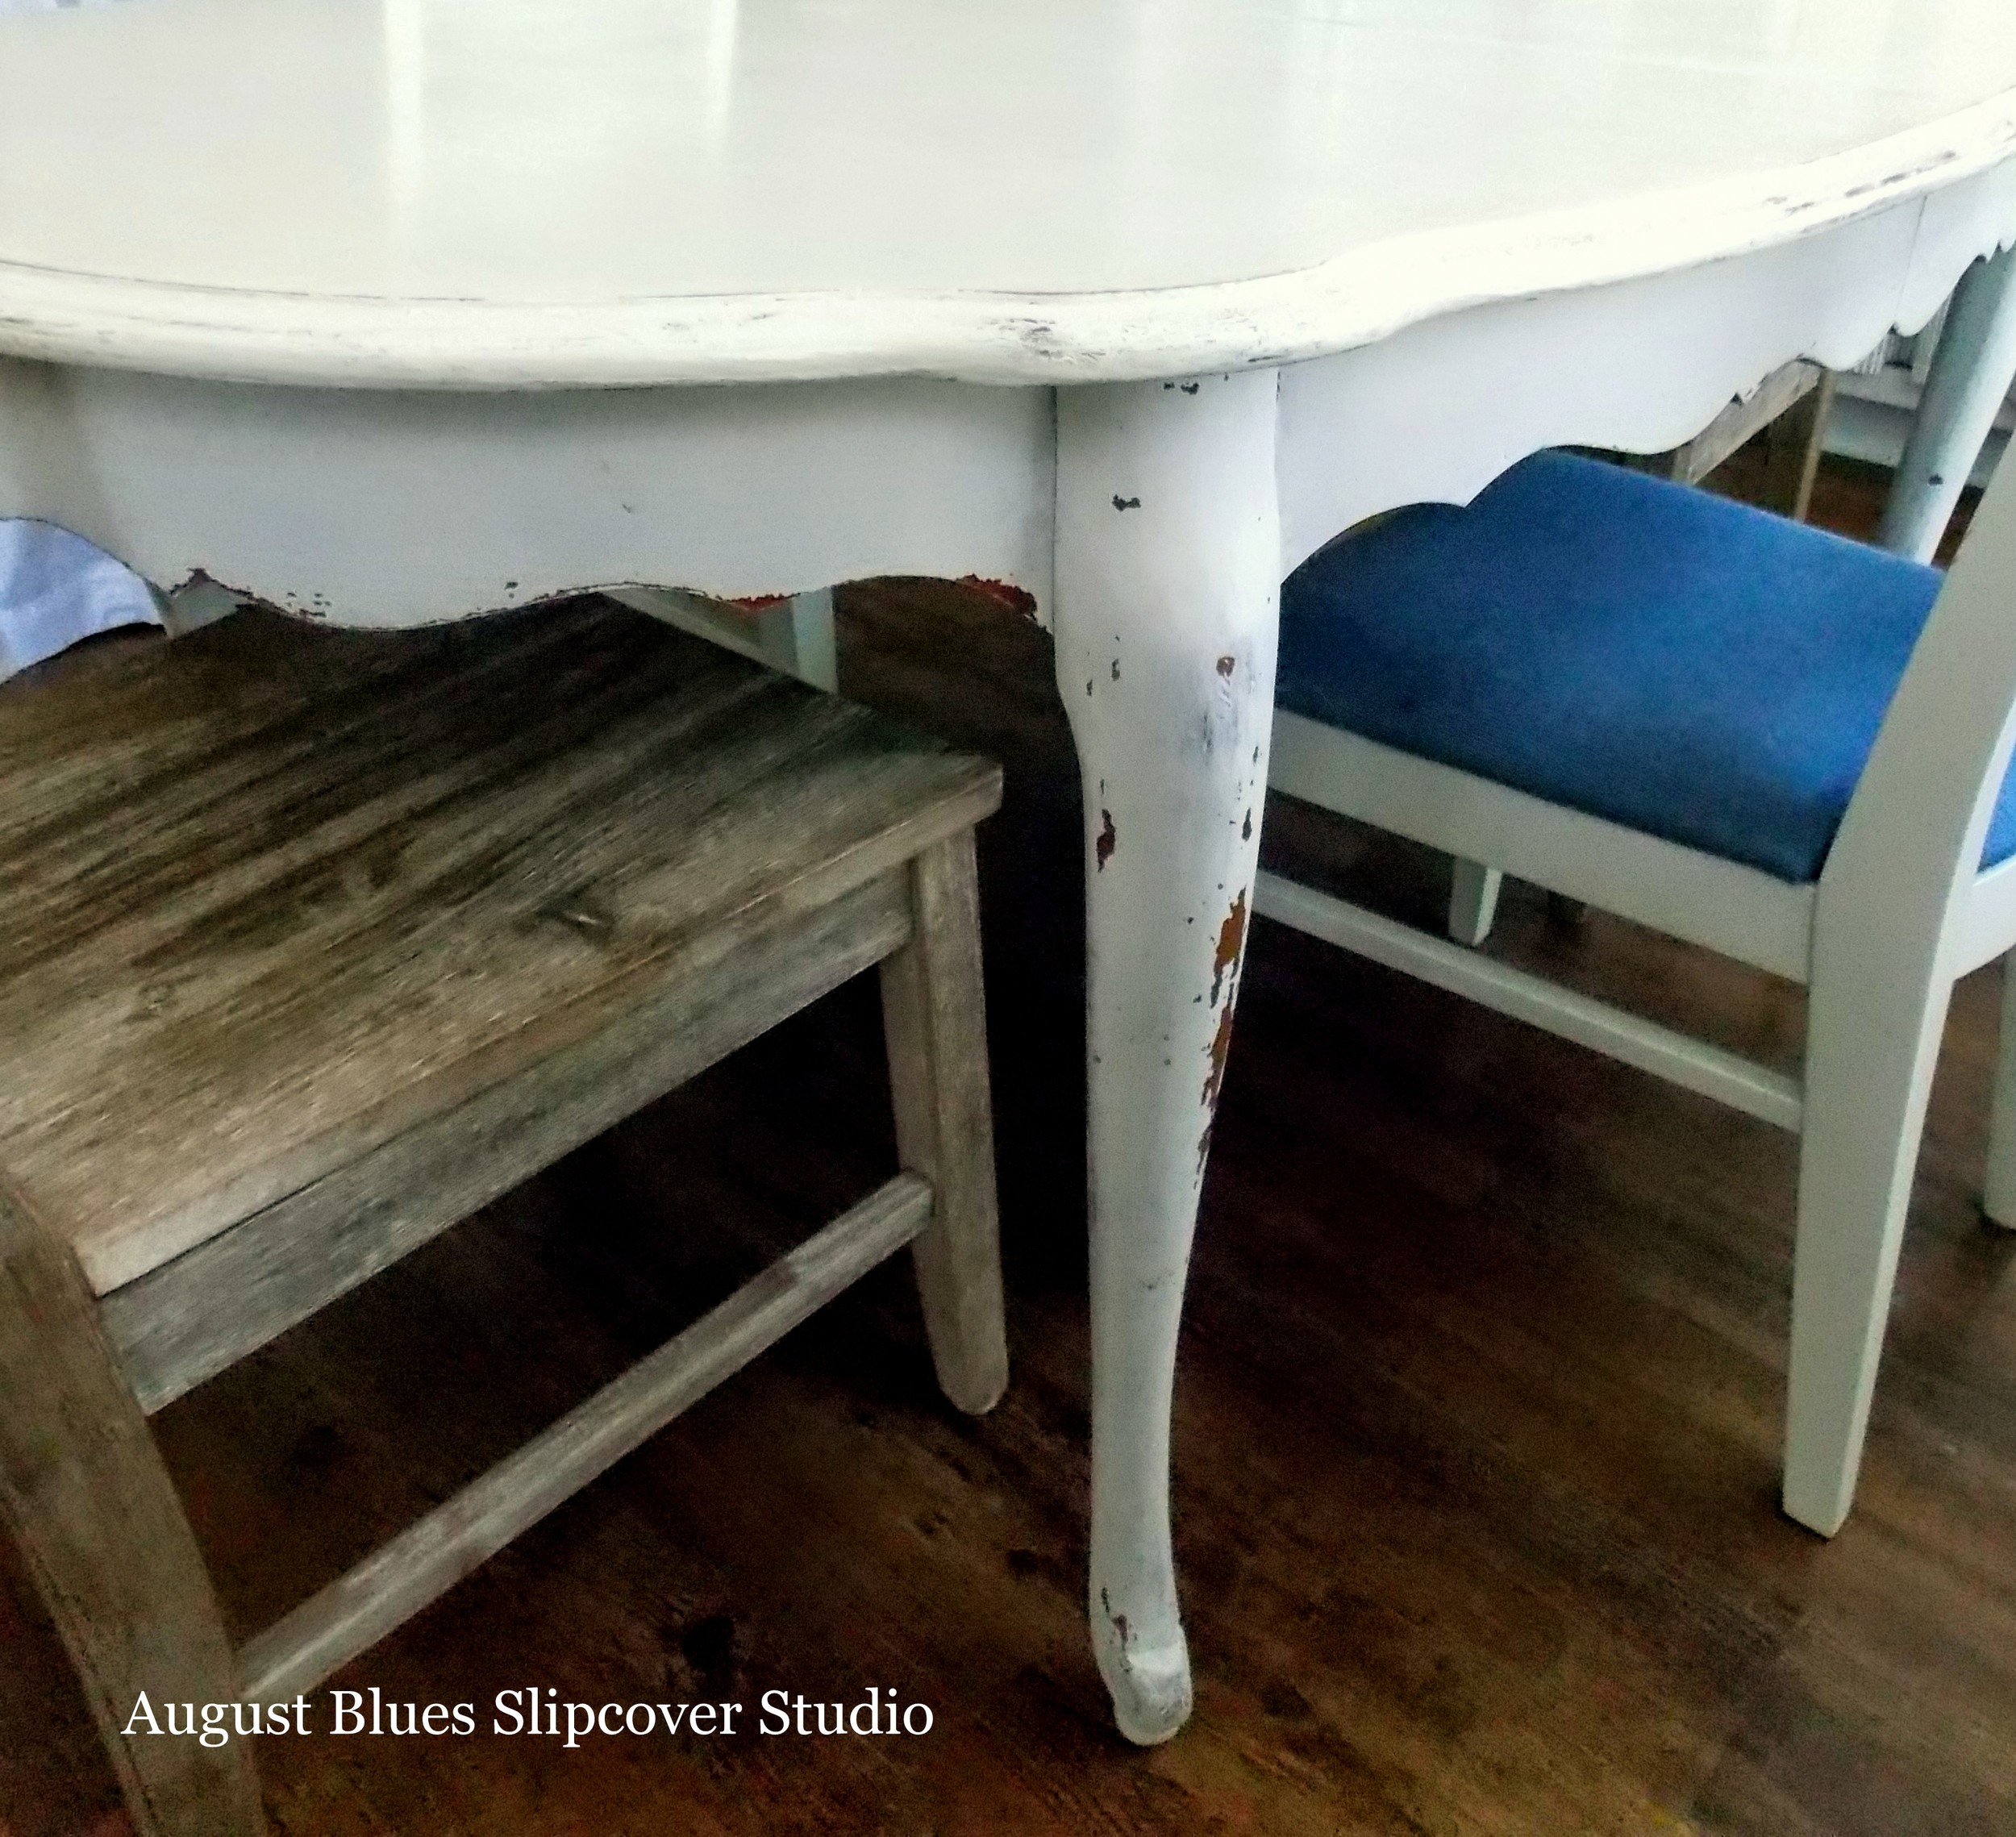
And if you were wondering where our kitchen table is, this is why it didn't make it into any pictures (warning: full disclosure ahead)...

August Blues - Tools on the table

The projects never end! We are in the process of putting up crown molding in our family room and this has become our worktable. At least the breakfast bar gives us somewhere to eat ;)

One more look...

August Blues - Kitchen Before and After2

Have you done any low-budget kitchen upgrades?

Sherri

P.S. Many thanks to the Professor for entertaining and then following through with my hair-brained ideas for our kitchen and to my dad for painting many of the cabinets, not once, but twice!

In DIY Tags budget-friendly, details, DIY, IKEA, kitchen, make-over, paint, white
8 Comments

I Won't Be Quitting My Day Job...

August 23, 2014 Sherri Rice
rose-bouquet.jpg

So, the story starts with my "need" to find a different kitchen table. Our IKEA table was getting chipped and worn and was looking more shabby than chic. I was trolling Craigslist on a regular basis and happily found a "new" table - a vintage-ish curvy French style for... $15!!! And the size was just a little better fit for our space.

August Blues - Table Before

My plan was to paint and distress it. I had been hearing a lot about milk paint, so I thought this would be a great opportunity to try it out. My first project turned out quite well, so I anticipated similar results. Well, if you have read anything about milk paint, you will know that it can be a little unpredictable. I opted not to use a bonding agent, since I wanted a chippy look.

August Blues - Chippy Table Leg

Well, the legs and skirt of the table turned out about like I was hoping - a little chippy, and easily distressed where I wanted it. I finished them with wax, and then flipped the table over to start on the top.

August Blues - Chippy Table Skirt

And that's where the project started to go south. I did two coats of the milk paint and it chipped like crazy! Like, half of the paint disappeared! And it didn't stop chipping, even after I thought I took off most of the chips and tried to finish it with the wax. It was just before Christmas and we were having house guests, so I decided just to go with it. We used a table cloth most of the time, but every time I took the cloth off, more paint chips fell on the floor. That got old real quick! In hindsight, I strongly suspect user error - I'm not sure that I mixed the paint correctly and the temperature in the garage where I worked was probably too cold.

So, in my abundance of paint wisdom, I decided to fix it with some coats of primer and latex paint (because I am impatient and I had those items on hand). Primer will stick to anything, right? It did make the table usable, but, while the primer stuck to the milk paint, the milk paint was not entirely stuck to the table. So the layers continued to peel off randomly as the latex paint stuck to plates, books, etc. It just looked BAD :/ (and I don't have a picture, but you can use your imagination!)

So, since the Nester says you can't ruin something you don't like and I was DETERMINED to make this table work, I picked up some stripper and went to work. A little (a LOT) of elbow grease later, and the table top was stripped down (mostly) to bare wood. Then I got some Vintage Farmhouse Paint (like I used here) and went to work...

August Blues - Vintage Farmhouse Paint

The color was a great match to the milk paint legs. 3 coats and some strategic distressing later, it was ready for a final finish. I was going to use wax, like I did here and here (I have been very happy with the finish on those pieces). But, I needed to get some more, so I decided to do a little online research before I headed out. The consensus was that, for a piece like the table, that would get heavy use, wax would not be durable enough and that a poly finish of some kind would be better. So, I came home with a water-based polycrylic (remember, I am working in our kitchen and it is Texas-in-August hot, so I didn't want to have the windows open more than necessary). 3 light coats (with light sanding in between), and here is the final result...

August Blues - Table After

Yep, the finish yellowed some, but now we have a functional table that (knock on wood!) will not chip or peel or otherwise get in the way of enjoying our meals. After all, it doesn't have to be perfect to be beautiful :) (Flowers and pretties don't hurt, though ;) )

August Blues - Table with Flowers

...And that, my friends, is why I will stick to slipcovers and leave the fancy paint finishes to the experts (well, at least until the painting urge strikes again)!

August Blues - Roses

Have you ever tried a project that didn't turn out quite like you expected?

Sherri

In DIY, Uncategorized Tags DIY, flowers, furniture, kitchen, make-over, paint, shabby chic, white
4 Comments

Fireplace Project

June 12, 2013 Sherri Rice
close-up.jpg

Happy Wednesday! Wow, my last post got a lot of attention - thank-you! I have the chair for my next project - just waiting for the fabric to arrive :)

In the meantime, I have been thinking for sometime (ok, since we bought the house, um, a "few" years ago) that our family room fireplace is in need of an update. Here it is...

August Blues - Fireplace

... in all its pink-bricked glory (please forgive the lame mantel decor - I got started and then never finished). The brick is the same as on the exterior of our house and it really looks a lot more pink than the picture shows :( And, you can sort of see that it is a corner fireplace, with about 12" of wall space on either side. The wall color (Valspar Desert Fortress) is relatively new so it will be staying.

In the last couple of years (yes, these things take me awhile!) this room has taken on a beachy, country, farmhouse sort of feel. So, my grand vision for this space includes doing something with the brick to get rid of the pink, changing the mantel, and probably finishing off the wall above the mantel with beadboard and crown molding (since we used beadboard here and here). And, since this will have to be a LOW budget make-over, it will be done in stages, starting with the brick.

Here are some ideas I have collected (click on the links below to check out the source; and I have more ideas here)...

20f59-dscn6889.jpg

Cleverly Inspired

Decorate With A Little Bit

The Lettered Cottage

Beneath My Heart

afde9-honeymoonandhouserenos058.jpg

A Great Adventure

So, what do you think? Whitewashed brick or painted? White mantel or wood (similar to our breakfast bar here)? Beadboard above? Replace the current screen? With what?

Do you have any summer projects?

I will keep you posted as this project progresses :)

Sherri

In DIY Tags beadboard, budget-friendly, fireplace, make-over, mantel
2 Comments

Welcome to August Blues - I'm so glad
you're here!  August Blues Slipcover Studio strives to enable your home to better serve its purpose, by providing you with quality custom slipcovers that enhance the appearance and functionality of your furniture pieces. Established in 2011 and located in Denton, TX...Read More


Subscribe

Sign up with your email address to receive news and updates.

We respect your privacy.

Thank you!

Blog RSS

© 2015 August Blues | Site designed by Caitlin Powell Design